Advanced Hydroponics
Advanced Hydroponics. 1
Introduction. 4
Requirements. 5
Light 5
Water 5
Medium.. 6
Aeration. 8
Support 9
Systems. 10
Aeroponics. 10
Aggregate Culture. 10
Aquaculture. 11
Continuous Flow Systems. 12
Getting Started. 14
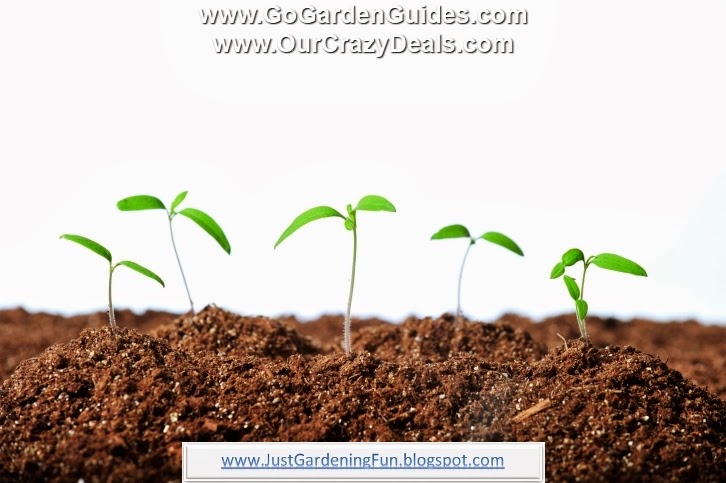
Germination. 14
Solutions. 15
Nutrient Deficiencies. 16
Introduction
Hydroponics is the process of growing plants in water. It typically
refers to raising terrestrial plants that normally grow in soil rather
than plants that are naturally aquatic. Hydroponics generally involves
the use of a nutrient solution to deliver essential minerals to the
plant. Many forms of hydroponics also use a soil-less medium, which
allows the plants to take root.
Horticulturalists have known that soil is not essential for growing plants
since the 18th century. Soil normally serves as a reservoir for minerals, which
dissolve in water and allow the plant to absorb the minerals through the
roots. However, it is also possible to dissolve the minerals in water
artificially and eliminate the need for soil.
The primary reason for
using hydroponics to grow crops is that the yield per unit surface area
is potentially much greater.
Hydroponics is useful in areas where soil
is not readily available. It is also a common method of growing plants
for teaching and research purposes.
- It is especially important to meet a plant’s requirements when
growing it with hydroponics, since the lack of soil makes the plant more
vulnerable to changes in the environment.
- Several specific systems
exist for growing plants hydroponically, which primarily differ in
precise method used to deliver the minerals to the plants. Starting the
plants from seeds is an important consideration in hydroponics.
- A
hydroponics engineer must also be able to identify specific nutrient
deficiencies based on the plant’s appearance.
Requirements
Plants have generally have the same requirements for light, water,
temperature and oxygen whether they are grown in water or soil. The lack
of soil means they may require a growing medium, and the plants may
also need some means of support. A hydroponics engineer must also pay
particular attention to maintaining the method of delivering minerals to
the plants.
Light
Hydroponic plants are often grown indoors, so they often require
the use of artificial lights, to achieve their best growth. Most plants need at
least eight hours of direct sunlight each day to thrive. Ordinary
lighting is too weak for this purpose, so you may need grow lights that
produce at least 1,000 foot-candles of light. Grow lights typically use
sodium lamps that operate under high pressure, which are quite
expensive. This type of lighting is normally used only serious hobbyists
due to their cost.
Proper spacing is also important to ensure each plant in a hydroponic
system receives adequate light, although the specific area depends on
the particular plant. The minimum spacing is generally the same for
plants in a garden. For example, tomato plants should have at least four
square feet of space for each plant. Lettuce plants should be in rows
at least nine inches apart with at least seven inches of space between
each plant in a row. Cucumbers require at least seven square feet of
space.
The plants in a hydroponics system generally do not grow as well
during the winter, even when they are in a greenhouse. This is primarily
due to the shorter days rather that the lower temperature. Poor weather
can also reduce the availability of light for greenhouse plants in the
winter. You should therefore avoid starting the plants in the fall and
growing them in the winter when natural light is at its lowest level.
Water
The difficulty in providing hydroponic plants with sufficient water
depends primarily on the specific system in use. The water culture
method easily provides plants with water, but adequate water can be a
challenge when you use the aggregate culture method. This method
requires you to estimate the water requirement of each plant. For
example, a large tomato plant needs up to ½ gallon of water per day
during hot weather. The plant roots can dry out and they may die when
you use the aggregate culture method without providing adequate water.
The lack of soil will cause the plant to recover from a low water level,
even after you have restored the water to its correct level.
The quality of water is also an important consideration in
hydroponics. A high alkaline content is often responsible for poor
growth in these plants. A high salt content can make it difficult to
maintain the proper level of nutrients, which may require additional
expertise in chemistry. A high sodium level is especially common with
water that has passed through a water softener. The total salt content
in a hydroponics system should remain below 320 parts per million.


Medium
A growing medium allows hydroponic plants to root but does not
provide nutrition. The best choice of medium depends on the specific
technique you plan to use. Common media in hydroponics include baked
clay, coir, rock wool, perlite, vermiculite, gravel, packing peanuts and
wood fiber.
Baked Clay
Baked clay is a common choice for hydroponic systems that require
tight control over the nutrients in the water. This material has a
neutral pH, does not react easily with other materials and does not have
any nutritional value. The manufacturer forms the clay into small
pellets and fires them in a kiln at a temperature of 2,190 degrees
Fahrenheit. The pellets expand in response to the heat, causing them to
become porous. They will not shrink over time, although the shape of the
pellets may be irregular. Baked clay is easy to clean and sterilize,
typically with bleach, vinegar or hydrogen peroxide. This property makes
it an ecologically sustainable material. The biggest disadvantage of
using baked clay is that root tips may penetrate the pellets, which can
inhibit the growth of the plants.
Coir
Coir is the fibers from the outer shell of a coconut. It is also
known as coco or coco peat when it is ground to a fine texture.
Commercial coir that is to be used as a growing medium in a hydroponic
system typically contains colonies of fungi in the trichoderma genus.
These fungi protect the roots from bacterial infections and help them to
grow. Coir absorbs excess water, making it difficult to over water
plants that grow in this medium. Coir can also store excess minerals
until they are needed by the plant.
 |
| Choir Fiber Displayed on Broken Coconut |
Rock Wool
Rock wool is made from filaments of molten rock, usually basalt. It
is generally inert to chemical and biological activity, and is the most
common medium used in hydroponics. Rock wool has a long history as a
successful hydroponic substrate but it is also a possible carcinogen.

Perlite
Perlite is a type of volcanic rock that comes from molten lava, which
is composed of basalt, granite and obsidian. The high temperature of
the lava causes these materials to fuse together in a process known as
fusionic metamorphosis. This change also causes the rock to expand and
form small, glass-like pebbles.
Perlite can be used as a hydroponic medium in loose form, but it may
be packaged in plastic sleeves. It is also a common ingredient in
potting soil where it reduces the density of the soil. Perlite is very
light in weight and may float to the surface of the water, especially
with hydroponic techniques that use drain or float feeding. Pumice is
similar in composition to perlite, but it is made from frothy and has a
lower density.
 Vermiculite
Vermiculite is also a volcanic rock formed by fusionic metamorphosis.
It is similar to perlite, but has a greater ability to absorb water.
This property allows vermiculite to store water and nutrients, which is
especially useful for passive hydroponic techniques. Hydroponic growers
often need to add perlite to vermiculite to increase the amount of air
available to the roots of the plants.
Gravel
Gravel is a collection of rock fragments that can vary greatly in
size and composition. The gravel used in hydroponics is small, typically
the size of the peat. This media is most common in any traditional
gravel filter bed that circulates water with electric. The primary
advantages of gravel are that it is inexpensive, drains well and easy to
clean. However, it is also heavy and requires a stronger container than
other containers used in hydroponic. Gravel does not absorb water, and
is suitable only for hydroponic techniques that provide water
continuously. Brick shards are generally similar to gravel, although
they require additional clinging and may change the pH of the water.
Polystyrene
Polystyrene is a type of plastic readily available in the form of
packing peanuts. They are primarily used in closed tube systems, where
the excellent drainage of polystyrene is in a band. Polystyrene is also
very light in weight, which generally make it unsuitable hydroponic
techniques that use open containers. Plants grown in polystyrene can
absorb this material, which may make it unsuitable for growing plants
intended for consumption. It is important to ensure that packing peanuts
are made of polystyrene, as biodegradable peanuts will decompose into
sludge.
Wood Fiber
Wood fiber is extracted from wood with friction and steam. This
organic substrate is popular in hydroponics, because it is inexpensive
and can maintain its shape for a prolonged period.
Aeration
Air is essential for plants to carry out photosynthesis. Plants that
are rooted in loose soil generally require no special measures to obtain
adequate aeration. However, plants will quickly exhaust the air in the
water with some hydroponic systems. This requires the grower to
introduce supplemental air, typically by bubbling it through the
nutrient solution. Continuous flow and aeroponic systems do not require
supplemental air since they provide a constant supply of water with
fresh air.
Nutrition
All plants require specific elements in order to live. Soil normally
provides these elements in adequate amounts, often without the need for
fertilizer. Hydroponics engineers must specifically supply these
elements to their plants. The primary elements that plants require
include nitrogen, potassium, phosphorus, calcium, sulfur and magnesium.
Additional elements such as iron, seeing, copper, manganese, chlorine,
molybdenum and boron are required only in trace amounts.
Temperature
The temperature requirements for hydroponic plants are generally the
same as they are for plants that grow in soil. Most plants can grow over
a relatively wide temperature range, but only achieve their best growth
within a narrow range of temperatures. For example, a cool weather
vegetables such as spinach, or let us grows best at a temperature
between 50 degrees Fahrenheit and 70 degrees Fahrenheit. Warm weather
plants may grow best at 80 degrees Fahrenheit or higher.
Support
The soil also provides physical support for terrestrial plants.
Hydroponic plants typically must be fastened to a vertical structure to
keep them upright. This generally requires the gardener to use stakes or
strings.
Systems
Hydroponic systems deliver water to the plants with a variety of
methods. The type of container that holds the plants also depends on the
specific system. The general types of hydroponic systems include
aeroponics, aggregate culture, aquaculture and continuous flow.
Aeroponics
An aeroponic system involves growing the plants in a closed
container. The container must also be kept dark to prevent algae from
growing on the surface of the nutrient solution. The roots are kept at
100 percent humidity with a misting system that keeps them from drying
out. The containers may vary in size and shape depending on the specific
plants, and may be lined with plastic. Tomatoes require a tall, narrow
container to support their vines. Shorter plants such as strawberries
grow best in an A-frame container that makes better use of space.
Aeroponics is an advanced hydroponics systems that requires an
experienced grower. The spray nozzles must be positioned so that it
directly sprays some portion of the roots. They may spray water on the
roots continuously or intermittently. A typical pattern turns the
sprayers on for 20 seconds, then off for 40 seconds. The spray mixture
often contains a fungicide to prevent the exposed roots from rotting.
Aggregate Culture
The
aggregate culture method involves growing the plants in an
aggregate material instead of water. This hydroponics system requires
two containers. One container holds the aggregate material the plants
and the other container holds the nutrient solution. A pump delivers
this solution to the roots on an intermittent basis to provide the roots
with nutrition and moisture. The solution then drains from the
aggregate container, allowing the roots to receive air.
An aggregate culture system typically pumps water to within an inch
of the surface of the aggregate bed before it is allowed to drain from
the container. The specific material may be any type of inert rock that
does not contain calcium. Common choices include silica gravel, basalt
and granite. Experimental agriculture systems may use other substances
such as crushed marble, perlite or Styrofoam.
It is important that the surface of the bed remain dry to restrict
the growth of algae. The aggregate material must be coarse to provide
rapid drainage of the container, typically with a diameter of at least ¼
inch. Larger material requires a more frequent delivery of nutrient
solution, whereas smaller material takes longer to drain. Aggregate
culture often uses a gravity-feed system. The nutrient solution flows
from the nutrient tank to the aggregate tank by gravity over a period of
about 10 minutes. The solution then drains from the aggregate tank into
a storage tank over the course of 30 minutes. A pump delivers the
solution back to the nutrient tank to repeat the cycle.
Aquaculture
An
aquaculture system completely immerses the roots of the plant in a
nutrient solution at all times. Hydroponic growers often start plants
in fine media such as perlite, sand or vermiculite until they reach a
certain size. They can easily wash this media from the roots and move
the plants to an aquaculture system.
Aquaculture hydroponics systems are the easiest to implement on a small scale,
but it needs a large amount of water. The specific design can vary
considerably, so long as it meets a few basic requirements. An
aquaculture system must support the plants above the nutrient solution.
It must keep light away from the solution to prevent the growth of
algae. Aquaculture also requires a method of continuously aerating the
roots.
The container for an aquaculture solution is typically made of
concrete or wood. A wood container will need to be sealed to protect it
from the nutrient solution, usually with asphalt or plastic. It is
essential to use a type of asphalt that does not contain tar or
creosote, which will leave a film on the surface of the water. The size
of the container can vary considerably, but it typically has a diameter
of two to three feet and a depth of up to one foot. A mature tomato
plant should have a container of at least two gallons. Common containers
for an aquaculture system include an aquarium, wading pool or plastic
pail. The container is typically covered with a sheet of plywood or
Styrofoam to keep light away from the nutrient solution. Drill or punch
holes with a diameter of about 1 inch to accommodate the plants.
Short plants like spinach and lettuce usually can support themselves
but tall plants such as tomatoes require artificial support. Pack cotton
or some other flexible material around the holes to hold the stems of
tall plants in place. Plants that grow vines such as tomatoes and
cucumbers will also require additional support as they grow. This
generally involves tying the vines to an overhead support.
The nutrient solution in an aquaculture solution may continuously
aerated by immersing a perforated hose in the solution. A pump can then
deliver air directly into the solution. The rate of air flow is
important, since too little air will not provide sufficient aeration and
too much air can damage the roots. An aquarium pump may suffice for a
small aquaculture system, but a large system may require a commercial
air compressor. Add water to the container each day to keep the level
constant. You will typically need to replace the nutrient solution every
two weeks when you start the plants and decrease the frequency to once a
week once the plants mature.
Continuous Flow Systems
A
continuous flow system delivers a continuous flow of nutrient
solution over the roots of the plants. This is the most common
commercial method for raising plants hydroponically. A continuous flow
system delivers the solution with a pipe. Small plant such as spinach
and lettuce typically use pipe with a diameter of two inches, while
large plants such as tomatoes may require a pipe with a diameter of a
six inches. The pipe should be on a slight slope to allow the nutrient
solution to flow freely across the plant roots. The pipe will have a row
of holes drilled into the top, typically with a diameter of a least one
inch.
The grower typically starts the plants in the root cubes until they
reach a certain size. The plants are then inserted into each hole in the
pipe. Small plants will be able to support themselves, while tall
plants will require support with string or wire.
The nutrient solution in a continuous flow system is stored in a
tank. It flows by gravity or is pumped through the pipes to keep the
roots continually bathed in a nutrient solution. The solution then
travels back to the storage tank and repeats this process.
Supplemental aeration is not necessary with a continuous flow system since the
nutrient solution aerates itself when it returns to the storage type.
The pipe used in a continuous flow system can be made of several
different materials. Polyvinyl chloride is a popular choice since it is
commonly used in plumbing systems. The primary disadvantage with PVC
pipe is its relatively high cost. PVC pipe must also be cleaned after
raising each crop to prevent the spread of disease. A cleaning solution
consisting of one part bleach and nine parts water is often used for
this purpose.
A continuous flow system may also use nutrient film to deliver the
solution. This material is a black plastic film formed into a flexible
tube with holes at regular intervals. A wooden tray must support the two
since nutrient film is not rigid. The primary advantage of nutrient
film is that it is considerably less expensive than PVC pipe.
Plastic corrugated drainage pipe may also be used in a continuous
flow system. A horizontal pipe carries the nutrient system, which
typically has a diameter of two inches for small plants and six inches
for large pipes. This pipe has holes cut along the top of a diameter of
about two inches. Vertical plastic drainage pipes are placed into these
holes and filled with peat moss. The plants are placed into each of
these vertical pipes. Capillary action carries the nutrient solution
through the peat moss and brings the solution to the roots. Hydroponic
growers typically start the plants with another method, although they
may also plant the seeds directly into the peat moss.
Getting Started
Hobbyists often need to run their hydroponics system outdoors,
although commercial operations typically take place in a greenhouse.
Common locations for a private hydroponics system include a patio,
rooftop or back yard. The starting schedule for outdoor plants is
generally the same whether they grown hydroponically or in soil. The
primary steps for starting hydroponic plants are germination and making
the nutrient solution. The identification of nutrition deficiencies is
also an essential requirement for growing plants hydroponically.
Germination
Hydroponic growers can generally plant large seeds directly in
aggregate culture systems since an aggregate medium will hold the seeds
in place. These seeds can germinate normally and the grower can thin
them according to the normal schedule for that particular species.
Smaller seeds typically must be started with other techniques and
transplanted to the hydroponic system when they are large enough to
withstand the conditions of that particular system. All plants will need
be started elsewhere and transplanted if you are using a water culture
system.
Hydroponic plants generally should be started in a manner that keeps
the roots exposed if you are going to grow them in an aeroponic or
water culture system. Plant the seeds in a starter medium such as perlite,
coarse vermiculite or quartz sand. Water the seeds according to their
normal starting requirements and keep them covered with moist paper
towels. Remove the paper towels after the plants germinate and thin them
as usual. Keep the seedlings moist with a nutrient solution since the
starter medium does not provide nutrients. This solution should be ¼ the
normal strength since the seedlings are not strong enough to benefit
from the full-strength solution. Wash the starter medium from the roots
when they ready to transplant to the hydroponic system. It is not
necessary to wash every particle of the medium from the roots.
Seedlings that will be transplanted to a continuous flow system
should be started in a root cube. This cube will provide the seedlings
with the extra stability and support they will require when you move
them to the tubes of the continuous flow system. A root cube is made of a
sterile material such as cellulose fiber, plastic foam or compressed
peat and vermiculite. Containers made of pure peat or peat and perlite
will disintegrate when you place the in a continuous flow system and may
clog the pump.
Solutions
Pre-mixed nutrient solutions for hydroponic systems are readily
available and relatively inexpensive. Advanced growers may also want to
mix their own solutions. This allows them to experiment with different
mineral concentrations, typically to optimize a plant’s growth producing
a deficiency symptom. A nutrient solution contains macronutrients and
micronutrients. Macronutrients are measured in relatively large
quantities and the precise amounts of these substances are not critical.
Micronutrients are measured in small quantities and the measurement
must be accurate to ensure good plant growth.
The ideal nutrient solution varies by plant but the following recipe
is easy to prepare and provides good result for a broad range of plants.
The salts in this recipe are commonly available and supply all the
macronutrients required by most plants.
The macronutrients for this
recipe include the following:
The magnesium sulfate and potassium phosphate should be reagent grade
while the calcium nitrate and potassium nitrate may be fertilizer
grade. Reagent grade chemicals are significantly more expensive than
fertilizer grade chemicals. Dissolve each ingredient separately in a
glass of warm water before adding it to 24 gallons of water.
The micronutrients in a nutrient solution are used in small amounts
and must be measured precisely. These ingredients should be
reagent-grade chemicals, which are available in chemical supply stores
or hobby shops.
The micronutrients in a nutrient solution include the
following:
Dissolve these ingredients in warm water before adding them to the
nutrient mixture. You may not need to add copper sulfate or zinc sulfate
if you are using tap water, since tap water normally contains these
compounds as impurities. Add sufficient water to the nutrient solution
to bring the volume to 25 gallons.
Substitute an iron chelate for iron sulfate if your water has a pH
above 7.0, meaning that it is alkaline. Prepare an iron chelate by
adding 1.5 ounces of iron EDTA to five quarts of water. Mix this
solution thoroughly and add ¼ pint of this solution to the main nutrient
solution. Prepare other iron chelates so that the final nutrient
solution contains 1 part elemental iron per million parts of nutrient
solution.
Plants will release waste products into the nutrient solution as they
grow, which will cause the water to become more alkaline, meaning the
pH will increase. Hydroponics growers will typically add sulfuric acid
to the nutrient mixture as needed to lower its pH to between 5.5 and
6.5. Large hydroponic systems may require growers to add acid to the
nutrient solution every day.
Growers may also add potassium hydroxide to the solution to increase
its pH. Add water as needed to keep the level of the solution constant.
Replace the entire nutrient solution every two weeks for seedlings.
Replace the solution each week once the plants begin growing.
Nutrient Deficiencies
Nutrient deficiencies are more common when growing plants
hydroponically, since the grower must add the nutrients artificially.
Each deficiency produces a
specific set of symptoms, so an experienced
grower can often identify the deficient element by observing the plants.
However, it is important to note that these symptoms may have other
causes besides nutritional deficiencies.
The non-metals needed by plants include
boron,
potassium, and sulfur. A
boron deficiency can cause shoot tips to die, and it will cause the
petioles and stems to become brittle. A lack of potassium can cause the
margins of the leaf to become yellow and continue towards the center. It
may also result in dead areas near the margins and tips of the leaves. A
potassium deficiency can make the lower leaves become mottled. A lack
of sulfur causes the upper leaves to be light green and the leaf veins
to be lighter than the rest of the leaf.
The primary metals needed for healthy plants include iron, manganese
and magnesium. An iron deficiency causes the parts of the upper leaves
that are between the veins to turn yellow while the large veins remain
yellow. The tips and edges of the leaves may also die. A lack of
manganese or magnesium may cause the upper leaves to develop dead spots.
The small veins in the upper leaves may also remain green, giving the
leaves a netted appearance.

 =
=


