Monday, December 30, 2013

Building Your Own Compost Bin

Building Your Own Compost Bin


Compost is a special type of organic material that may be added to the soil in which plants are placed in order to assist in the growth process. Scraps derived from foods and debris from yards makes up approximately 30% of what we all dispose of on a regular basis.

When these organic materials are placed in landfills, they not only take up valuable space within the landfills, they also release a greenhouse gas that is considered to be potent, called “Methane”. With the proper funding, environment, and technology for greenhouse gases that can be reduced significantly, but only if the world unites in the cause and works together. However, when the materials are used in composting bins, they are considered to be exceptionally beneficial in numerous ways.

If you are a gardener, you will benefit in numerous ways by building your own compost bin. In this guide, you will learn about the art of composting and will be provided with basic instructions on how to create your own compost bin for the purpose and Intent of Composting.


Benefits of Utilizing a Compost Bin


Before constructing your own compost bin, it is essential that you learn the value behind these structures.

As mentioned previously, there are numerous benefits associated with utilizing a bin that is designed for the process of composting. The following highlights the top benefits, according to gardeners:

  • Compost bins assist in enriching the soil with a wide array of nutrients that are highly productive in plant growth.
  • Compost is productive in helping soil retain moisture that is necessary for growth.
  • The organic material that compost is composed of assists in suppressing various types of diseases and pests that commonly affect plant life.
  • By utilizing a compost bin, you may successfully eliminate the need and dependency on fertilizers that are composed of synthetic and potentially harmful chemicals.
  • Gardening bins composed of compost assist in encouraging the overall production of productive bacteria and various forms of beneficial fungi that help to break down various types of organic materials. This, in turn, assists in creating what is referred to as “Humus”. Humus is a material that has large amounts of material that is filled with many different types of nutrients.
  • Compost bins assist in reducing methane gas emissions that commonly develop in landfills. As a result, implementing the use of these composting and gardening bins assist in reducing your carbon footprint.


Composting Ingredients

When creating a composting bin at home for gardening, it is important to first ensure that you have the right ingredients for the product. Essentially, there are three main ingredients utilized in composting bins.
  • The first type of ingredient is referred to as “Browns”. This type of material includes twigs from trees, branches and even leaves that have died.
  • The next type of ingredient material is referred to as “Greens”. These materials consists of clippings from grass, waste produced by vegetables, scraps from various types of fruits, and even coffee grounds.
  • The last ingredient that must be added to the compost bin is water.


By ensuring that all of these ingredients are used, you can rest assured that your compost bin will be optimal for the growth processes associated with the plant life that you place within the bin.


Basic Composting Bin Construction

When learning how to build your own composting bin, you will find that you have numerous options. Of course, some options are more expensive than others.

In the same respect, a few of the options are more time consuming than others. For the purpose and intent of this guide, we will elaborate on an inexpensive composting bin option that takes very little time.
  1. First, you will need to gather a few materials. It is best to purchase a garbage receptacle that includes a lid that easily locks on the unit.
  2. Next, you will need a type of platform.
  3. Once these items are obtained, you will need to purchase screws so that you may connect the garbage container onto the platform that you have designated for the project and you will require a drill that has a drill bit that is relatively large.


Once you have acquired all of the necessary materials, you may follow the steps outlined below to successfully build your own composting bin:

  1. You should place up to forty five holes in your trash container. The holes should be made using the drill that you have designated for the project and should be placed on the sides of the product, the bottom of the product and in the lid.
  2. Next, you will need to attach the trash container onto the platform – ensuring that the holes that you have created are not obstructed. The platform – combined with the holes placed in the garbage bin – will assist in properly draining the bin where the compost process will take place.
  3. Once the garbage container is attached to the platform, you will take the ingredients that you have designated for the bin and place them inside of the trash container.
  4. You should ensure that each week, you mix up the ingredients so that the process of composting advances appropriately.
  5. Once the soil that develops appears to be dark and rich in nutrients, you may use it to cultivate various types of crops.


Video #: 1


"Do It Yourself Plans to Turn Garbage Containers, into Perfect Inexpensive Compost Bins"

PublisherVictor Fernandez

Date Uploaded: Uploaded on Aug 13, 2011

SourceYouTube.com

Run-time: 2:11

Views: 23,227

Description: Victor show's you his personal plan and design to build a compost bin at home, including a step by step instruction list, and required tools.

License: Standard YouTube License


Video #: 2

"How to Build a Free Garden Compost Bin"

Video Title: "How to Build a Free Compost Bin"
Publisher: Doug Green

Date Uploaded: September 28, 2008
Source: YouTube.com
Run-time: 0:53
Views: 217,027
Description: Doug Green is a professional garden author who works at Simple Gift Farms Compost copywriting department and has more videos that can be found at the links below.

Follow Doug on Social Media:


This is one of the easiest strategies for building your own composting bin.


When constructing this type of unit, the main goal is to have a place where ingredients may be combined that will result in the development of a rich soil.
  • Once you have created the rich soil within the bin, you may then utilize it for your gardening needs. 
  • Remember, there are certain items that should and should not be used in building a compost bin.


Research this information carefully to ensure the highest level of safety.

Conclusion:
Clean Air Gardening Compost Buyers Guide Logo


About the Author of this Post:

 Written Topics:
  • Compost Tea
  • Worm Composting
  • Compost Piles
  • Non-Compostable Materials
  • Compostable Materials
  • Waste Removal Laws and Practices
William D. Morris: 
This post was written by Mr. William D. Morris, age 26, who is a close friend and business associate of the Just Gardening Fun blog. William is an expert in home improvement, landscaping, and do it yourself projects, he often assists with greenhouse installations & setups, in addition to shooting video and taking pictures, during the process.

Will is a member of the Go Gardening Guides network and chief manufacturing warehouse manager & engineer. 


Tuesday, December 24, 2013

How to Identify Greenhouse Pests with 5 Warning Signs

Want to Know How to Properly Find and Identify Greenhouse Garden Pests and Insects? This Post Should Help!

Imagine that you were all excited to create a greenhouse garden. You fantasized about growing your very own vegetables and fruit.


Perhaps, you even decided to grow beautiful roses for aesthetic purposes. You put your plans into motion and everything appears to be going smoothly. The plants are budding. Then, one day you go into the greenhouse and notice holes in your plants and some may even be dying or dead.
  • What on Earth went wrong?
  • Are you a horrible gardener?
  • Do you not have a green thumb?

Most Common Greenhouse Bugs, Pests, Insects, & Diseases:


  1. Whiteflies
  2. Mealybugs & Scales
  3. Mites (Spider Mites, Broad Mites, etc.)
  4. Thrips
  5. Leafminers
  6. Fungus, GNats, Shore Flies


Anyone can become a great gardener with the proper information!

The reason your plants died or were damaged is because you did not know how to identify greenhouse pests. It is crucial to regularly examine your plants for various pests. At the first sign of harmful garden pests, you should immediately take action to eliminate them to keep your plants healthy.


Most of the harmful greenhouse pests will not be able to be seen by the naked eye, so you should purchase a magnifying glass.


Tip #1: Leave the Lady Bugs Alone

If you see lady bugs in your greenhouse, do not feel alarmed. Ladybugs eat the larvae of other insects and aphids.


Tip #2: Look Out for the White-Fly 

The white fly is a small white, moth-like insect that feeds on the sap of plants, underside of leaves, and they carry a virus that is harmful to plants.
  1. Check the younger leaves of your plants for eggs laid in circular patterns. This is a sign that you have white flies. White flies are easier to spot than other pests, because you can see them without a magnifying glass.
  2. They are around 1/8 inch in size.
  3. If you have white flies, you can add ladybugs, green lacewings, or songbirds to naturally eliminate them.
  4. During March and September, you can also choose to use encarsia formosa, a tiny golden wasp that is most effective for killing white-flies.


Tip #3: Watch Out for Spider Mites

Spider mites are a common problem for gardeners.
  • If you notice a white dotted pattern on your leaves, then you have spider mites.
  • It is hard to see the white dotted pattern with the naked eye, so use a magnifying glass to ensure you don't miss it.
  • You may also see the tiny spider-like creatures on the leaves.


Judging by its name, you may think that you should look for webs to spot spider mites. However, webs are a sign of a very bad infestation of spider mites. You don't want to allow it to get to that point before acting!

Remember that the earlier you catch nasty pests, the better off your garden will be.


Tip #4: Look Out for Mealybugs

Mealybugs are tiny, spiny oval shaped insects that are a common greenhouse pest and are very destructive.
  1. They reproduce rather quickly, so you definitely want to combat mealybugs as soon as possible. Like the whitefly, the mealybug also contains a virus that it injects into the plant. This virus can even infect neighboring plants and eventually the entire garden!
  2. One of the ways to catch mealybugs is to look for gray or white cotton-wool looking covering on any part of the plant.
  3. Their nests appear to be fluffy.
  4. Don't forget to check the base of the plant, because mealybugs can create a nest on any part of the plant.
  5. You wouldn't want to miss one of the signs.

Another way to know something might be up is if you see ants.

Mealybugs secrete a chemical called honeydew that ants enjoy eating. However, there are other greenhouse pests that also secrete honeydew. So, do not just assume you have mealybugs when you see ants. Further inspection will be required to narrow it down.

In order to get rid of mealybugs, manually remove the white cotton-like covering from the plants, because this is resistant to insecticides. Next, us a contact insecticide that contains malathion or a systemic insecticide. If the infestation is not severe, you will be able to manually pick the mealybugs off with tweezers.


Tip #5: Watch Out for Soft Scales

Soft scales are wingless, headless insects that appear to be small flattened brown discs. The males have a pair of wings, but are rare to find as they only live for a few hours. Some species of soft scales are a different color, such as black. They also release honeydew, like the mealybugs.

White flies, spider mites, mealybugs, and soft scales are common greenhouse pests that you should know how to spot and exterminate. However, they are certainly not all of the possible insects you should be able to identify.


Summary
"I found that this guide was one of the best, that I have come across, and is certainly in that elite bracket, of all-time best reference bases. The book contains very hard to find answers, for complex calculations and equations, that allow us to learn and understand things never thought possible. I would recommend this to both the expert career grower and the ultra green first time gardener."
Whitney M. Segura (Owner and Chief Executive Marketing & Operations Officer)
Our Rating of This Guide: 10/10


About the Author of this Post:

Dina Segura is the wife of Mr. Ernest 'Butch' Segura, mother of brothers Stewart Segura and Whitney Segura, and she is an important share-holder at EarthCare Greenhouses, and asset to the company. Dina was raised in Lafayette, LA and has experience working in the oil field, until recently, when she began working part-time at Segura Trading, along with her sons and husband.

When it come's to gardening, she is a natural, and has a life-time full of experience growing plants and produce. Which, is a priceless thing, when one want's to test the quality and durability of gardening products and accessories, learn more about item's she has personally approved.


Important Links: The following website's and webpage's have been reviewed and found worthy of our stamp of approval, and recommendation.

Florida Greenhouse Pest Management Guidehttp://edis.ifas.ufl.edu/cv248

United States of America's Drought Monitor
Drought Monitor: UNL.edu & the USDA (http://droughtmonitor.unl.edu/)


College of Agriculture and Life Sciences, Cornell University
Image Gallery of Greenhouse Pests and Diseases - By: Cornell Greenhouse Horticulture (http://www.greenhouse.cornell.edu/)
Publication By: Cornell
Department(s): Department of Horticulture; Greenhouse Horticulture
Address: 134A Plant Sciences Bldg, Ithaca, NY 14853 USA
Email: hort@cornell.edu
Phone: 1 (607) - 255 - 4568 / Extension: 1789
Fax: 1 (607) - 255 - 9998 / Extension: 0599
School Abbreviation(s): n/a


UK Agriculture, Food, & Environment School
Greenhouse Ornamental Pest & Insect Controlhttp://www2.ca.uky.edu/entomology/entfacts/ef421.asp
Publication By: University of Kentucky
Department(s): College of Agriculture, Food, and Environment
School Abbreviation(s): UKAg or UK


Other Great Resources on Dealing with Insects, Pests, and Other Common Problems:


"Integrated Pest Management: Greenhouse Pest Management is Making Pennsylvania’s Greenhouse Industry More Profitable"


School / Organization: Pennsylvania Government, Department of Agriculture


Download URLhttp://www.agriculture.state.pa.us/portal/server.pt/gateway/PTARGS_0_2_24476_10297_0_43/AgWebsite/Files/Publications/Integrated%20Pest%20Management.pdf


Total Pages: 21


"Insect & Mite Management in Greenhouses"
School / Organization: University Extension Tennessee
Download URLhttps://utextension.tennessee.edu/publications/documents/pb1594.pdf


"Greenhouse Pests: Insects & Pests" by David J. Shetlar, Ph.D. aka The “BugDoc”


Publication E-Book Title: Greenhouse Pests: Insect & Mite Pests

School / Organizations: Ohio State University, OARDC, and OSU Extension.


Sub-Association Extensions: OARDC & OSU Extension


Written by: David J. Shetlar, Ph.D. aka The “BugDoc”

Institution: The Ohio State University

Location: Columbus, OH

Copyright Date: © November, 2003, D.J. Shetlar

Download URL:  http://bugs.osu.edu/~bugdoc/Shetlar/462/pdf/greenhousepests.PDF


Common Diseases and Pests found in Greenhouse Production
Class: HLT 203
Building: Front Range
Educational Facilitator: Colorado State University: Cooperative Extension
School Type: Community College
Instructor: Laura Pottorff
Download PDFhttp://www.coopext.colostate.edu/adams/gh/pdf/HLT203-CDGP.pdf


Other References:
Casey, C. Ed. 1997. Integrated Pest Management for Bedding Plants. A Scouting and Pest Management Guide. Cornell Cooperative Extension Pub. No. 407 109 pp.
Skinner, M, C. Frank and R. Valentine. 2011. Aphid Banker Plant System for Greenhouse IPM, Sept by Step


Sunday, December 22, 2013

Popular Budget Vegetable Container Gardening Ideas

Popular Budget Vegetable Container Gardening Ideas

Container gardening is more than a notion!


What was a growing trend has become serious business. With national economy continuing to spin in negative space…with more and more people taking charge of their own health…with Eco-consciousness at an all-time high, it makes sense to grow your own vegetables.

Innovative Containers

Wouldn't it be lovely to grow veggies in a hand-painted china container? Lovely, but not exactly cost effective! Here are a few ideas on how to obtain cheap-to-free containers.

  • Garage SalesCome spring garage sales, estate sales and block sales suddenly sprout-up like stinging nettles.
    • Enlist a friend and make a grand day of treasure hunting.
    • Have lunch and nurture your friendship.
    • Keep your eagle eyes peeled for pots without lids.
    • Or, hit the mother lode with a claw footed bathtub, perfect for your root vegetables.
    • Tip: Don't be afraid to haggle, it's expected.

  • Fast Food Restaurants Ask managers of local fast food restaurants to save their five-gallon containers. You keep plastic out of the landfills and re purpose these containers, which is a brilliant Eco-friendly effort.


  • Dollar StoresYou'll find dozens of spiffy planters and containers for a buck.

  • Thrift Stores Good places to scout for innovative containers, such as chipped tea pots, bright colored buckets, etc.
    • Think big!
    • You'll need several 3-5 gallon pots to accommodate vegetables with long roots.

  • Hardware, Garden or Farm StoresCheap source of old-fashioned galvanized wash tubs and half whiskey barrels.
    • These are excellent containers for veggies like cucumbers and squash.
    • Tip: While you're browsing, watch for sales on vegetable seeds.

  • Dumpsters and Roadside - You probably aren't excited about dumpster diving and it isn't necessary.
Classic Family Organized Garden Planning and Preparation Picture
Just watch for stuff parked outside dumpsters or on the roadside, which somebody set out with the trash. Don't be surprised if you luck upon some of those pretty hand-painted china containers! 
  • Tip: Don't collect containers that initially held chemicals.

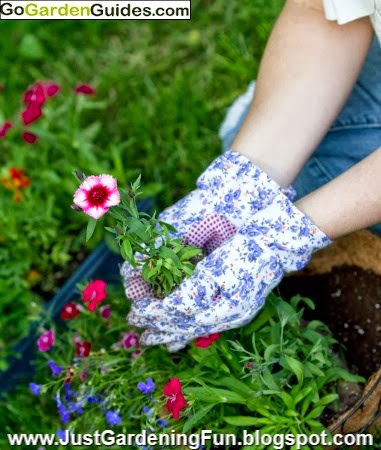
Gardener Holds Final Flower to Plant in Hanging Basket with Pink Flowers


Right Size Container

Congratulations on using your ingenuity to obtain a stash of containers.

Now, you need to put every vegetable in his correct sized pot. Here are a few suggestions for vegetables that thrive in containers:

  1. Broccoli – One plant per 5-gallon container.
  2. Tomatoes - One plant per 5-gallon pot.
  3. Peppers – One plant per 2-gallon container.
  4. Carrots – 5-gallon container, minimum 12" deep.
  5. Squash – One plant per 2-gallon pot. Tip: the pinstriped squash is a conversation starter and tastes yummy!
  6. Cucumber – One plant per 5-gallon pot.
  7. Onions – 5-gallon wooden planter or pot.
  8. Garlic – needs 8" deep container – hand painted china pot?

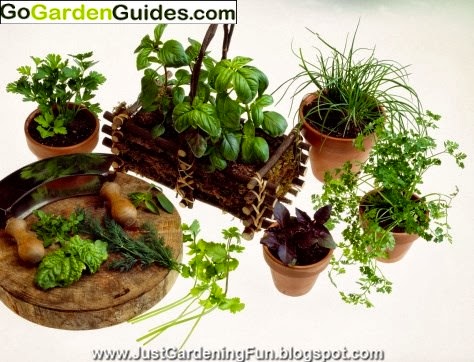
Potted Green Garden Herbs Picture


Free Seeds or Money-Off Coupons

  1. Gardening Catalogs – In order to keep ahead of competition, many gardening catalogs advertise through money-off coupons. When you receive your order it will usually include free seed packets.
  2. Friends or Colleagues – Do you have friends or coworkers who are obsessed with gardening? Consider hosing a seed swap. Have everyone bring a dessert and spare seeds to swap. Brew a pot of coffee and let the fun begin!
  3. Online Seed Swaps – Check the internet for seed swap websites. Most people will send seeds free, provided you pay the postage.
  4. Seeds from the Cupboard – Virtually any seeds from your pantry make fair game for planting. Get a few dried beans or peas such as lentils, red beans and chick peas from the pantry. Put in a pot and cover with about 2" good soil. Beans/peas will need six hours of sunlight daily. Garlic cloves that have dried out, ginger root, old beets or potatoes can all be planted. Check your spices for whole seeds such as fennel, mustard seeds, poppy seeds, sesame and dill.
Gardener Holds Final Flower to Plant in Hanging Basket with Pink Flowers


The Process

Let's briefly go through the container garden process from planting to harvest.

  1. Soil – Don't skimp on good-quality soil. Best potting soil mix contains organic compost, bark chips, and peat moss. It should also contain perlite or vermiculite to help the soil preserve moisture and aerate it.  These mixes will remain pest, disease and weed free due to heating during processing. Beginners might prefer using soil-less mixtures because they are lighter if you need to move containers about. Many contain fertilizer so you can skip that step for a month or so.
  2. Water – You'll get a greater yield if soil is uniformly moist. During dry, hot weather you'll need to water daily. Use a watering can and water all around top of container. Keep water away from foliage if possible to discourage disease.
  3. Food – Use dry organic fertilizer as directed. Apply fish emulsion weekly.

Invention of Watering Garden Plants using Creative Concepts of Protection


Celebrate your Bounty

Once you've plucked your first succulent tomato and eaten it straight from the vine, you'll be totally hooked on container gardening.

Get growing! It's healthy! It's fun! It's frugal!

What Was the Reason, You Started & Get Into Gardening?